
Week-5: IAM
Learning Objectives
By the end of this part, students should be able to:
- Explain what Keycloak is and why it is used in Identity and Access Management (IAM).
- Identify the main components and concepts in Keycloak.
- Differentiate between authentication, authorization, and federation within the IAM context.
- Relate Keycloak’s architecture to standards such as OIDC and SAML.
Note: Setup Before You Begin
Kali Linux
As you work through Part 1, start downloading and installing Kali Linux if you do not already have it. The process can take a while, so doing this in parallel will save time. By the time you reach Task 2, Kali should be ready for testing the Keycloak-secured application.Download Kali from here if you don't have it already
Recommended Workspace
For a smoother workflow, use the same machine and browser for Keycloak and this lab guide. This lets you:
- Quickly copy and paste URLs and settings
- Use local links such as
http://127.0.0.1:8080without retypingIf you are on Linux or macOS, open two browser tabs side by side:
- Keycloak Admin Console
- This lab guide
Part 1: What is Keycloak: www.keycloak.org ?
Keycloak is an open-source Identity and Access Management (IAM) system developed by Red Hat (now part of the CNCF).
It provides:
- Single Sign-On (SSO) across multiple applications.
- User federation - integration with LDAP, Active Directory, or external identity providers (for example Google or GitHub).
- Centralised authentication using open standards (OpenID Connect, OAuth 2.0, SAML 2.0).
- Role-based access control (RBAC) and fine-grained authorisation policies.
- Account management through a self-service portal for users to change passwords, enable MFA, and manage their profile.
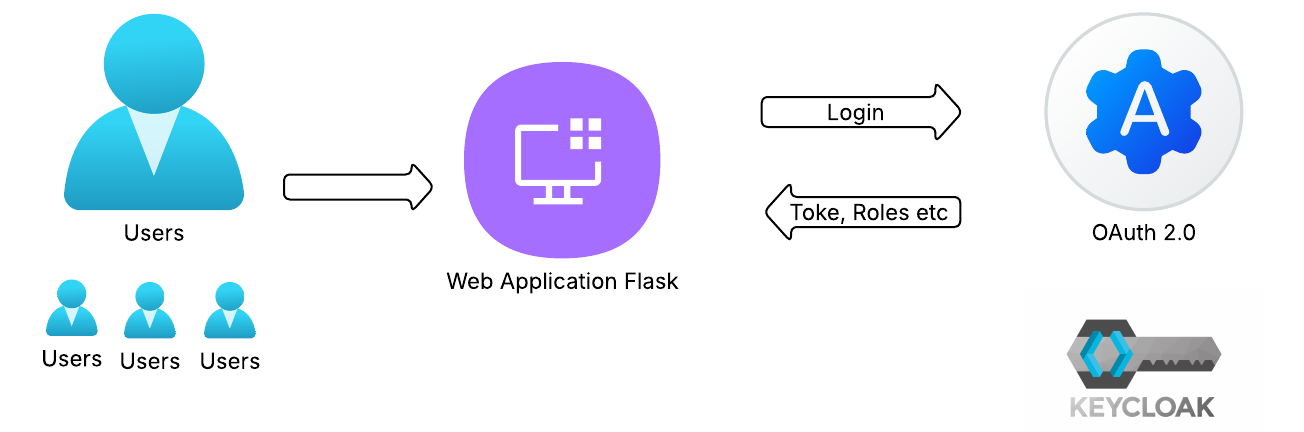
In modern systems, Keycloak acts as the Identity Provider (IdP) issuing tokens to applications that act as Service Providers (SPs) or Relying Parties (RPs).
2. Key Concepts and Terminology
| Concept | Description | Analogy |
|---|---|---|
| Realm | An isolated namespace that manages its own users, clients, and roles. Think of it as a tenant or domain. | A separate “workspace” for an organisation or project. |
| Client | Any application or service that uses Keycloak for authentication. A client can be web, mobile, or API. | A web app asking Keycloak to verify identity. |
| User | Represents an individual identity with credentials and attributes. | A person with a login account. |
| Group | A collection of users that can share roles and attributes. | A department or team (for example “Analysts”). |
| Role | A named permission that defines access rights (for example admin, viewer). Can be defined at realm or client level. | A job title determining what a user can do. |
| Identity Provider (IdP) | External system Keycloak can connect to for login (for example Google ID, Azure AD). | Passport control accepting an external ID. |
| Federation | Linking Keycloak to an external user store such as LDAP or AD. | Importing existing staff accounts. |
| Protocol | Communication standard: OIDC and SAML are supported. | The language for exchanging identity proof. |
| Token | Cryptographically signed information about the authenticated user (ID token, access token, refresh token). | A temporary digital pass. |
3. Why Organisations Use Keycloak
- Simplifies login across multiple applications (SSO).
- Enforces consistent MFA, password, and security policies.
- Enables central auditing of authentication events.
- Reduces development time by externalising IAM logic.
- Integrates easily with Docker, Kubernetes, and CI/CD environments.
Test your knowldege so far by trying the follwing:
Part 2 - Deploying and Exploring Keycloak (Hands-On)
1. Prerequisites
Before you begin:
-
Ensure Docker is installed and running on your system.
- If you have not installed Docker yet, follow the instructions in Week 3 Lab - Installing Docker from here.
-
Verify Docker is working correctly:
docker --versionYou should see output similar to:
Docker version 26.x.x, build ... -
Make sure port 8080 on your local machine is available (not used by another service).
-
Create a working directory for this lab, by creare a folder using GUI or CL as follows:
mkdir iam_lab
cd iam_lab
2. Start Keycloak Locally Using Docker
Run the following command in your terminal:
sudo docker run -p 127.0.0.1:8080:8080 -e KC_BOOTSTRAP_ADMIN_USERNAME=admin -e KC_BOOTSTRAP_ADMIN_PASSWORD=admin quay.io/keycloak/keycloak:26.4.2 start-dev
Explanation:
-p 127.0.0.1:8080:8080binds Keycloak to your localhost, making it accessible only on your own computer.KC_BOOTSTRAP_ADMIN_USERNAMEandKC_BOOTSTRAP_ADMIN_PASSWORDcreate the initial admin account.start-devruns Keycloak in development mode (no TLS, quicker startup).
Wait until you see a message similar to:
INFO  ... Keycloak 26.4.2 (dev mode)
INFO  ... Listening on: http://127.0.0.1:8080
or

3. Access the Admin Console
-
Open a browser and go to http://127.0.0.1:8080
-
Click Administration Console.
-
Log in with:
- Username:
admin - Password:
admin
- Username:
You should now see the Keycloak Admin Console Dashboard.
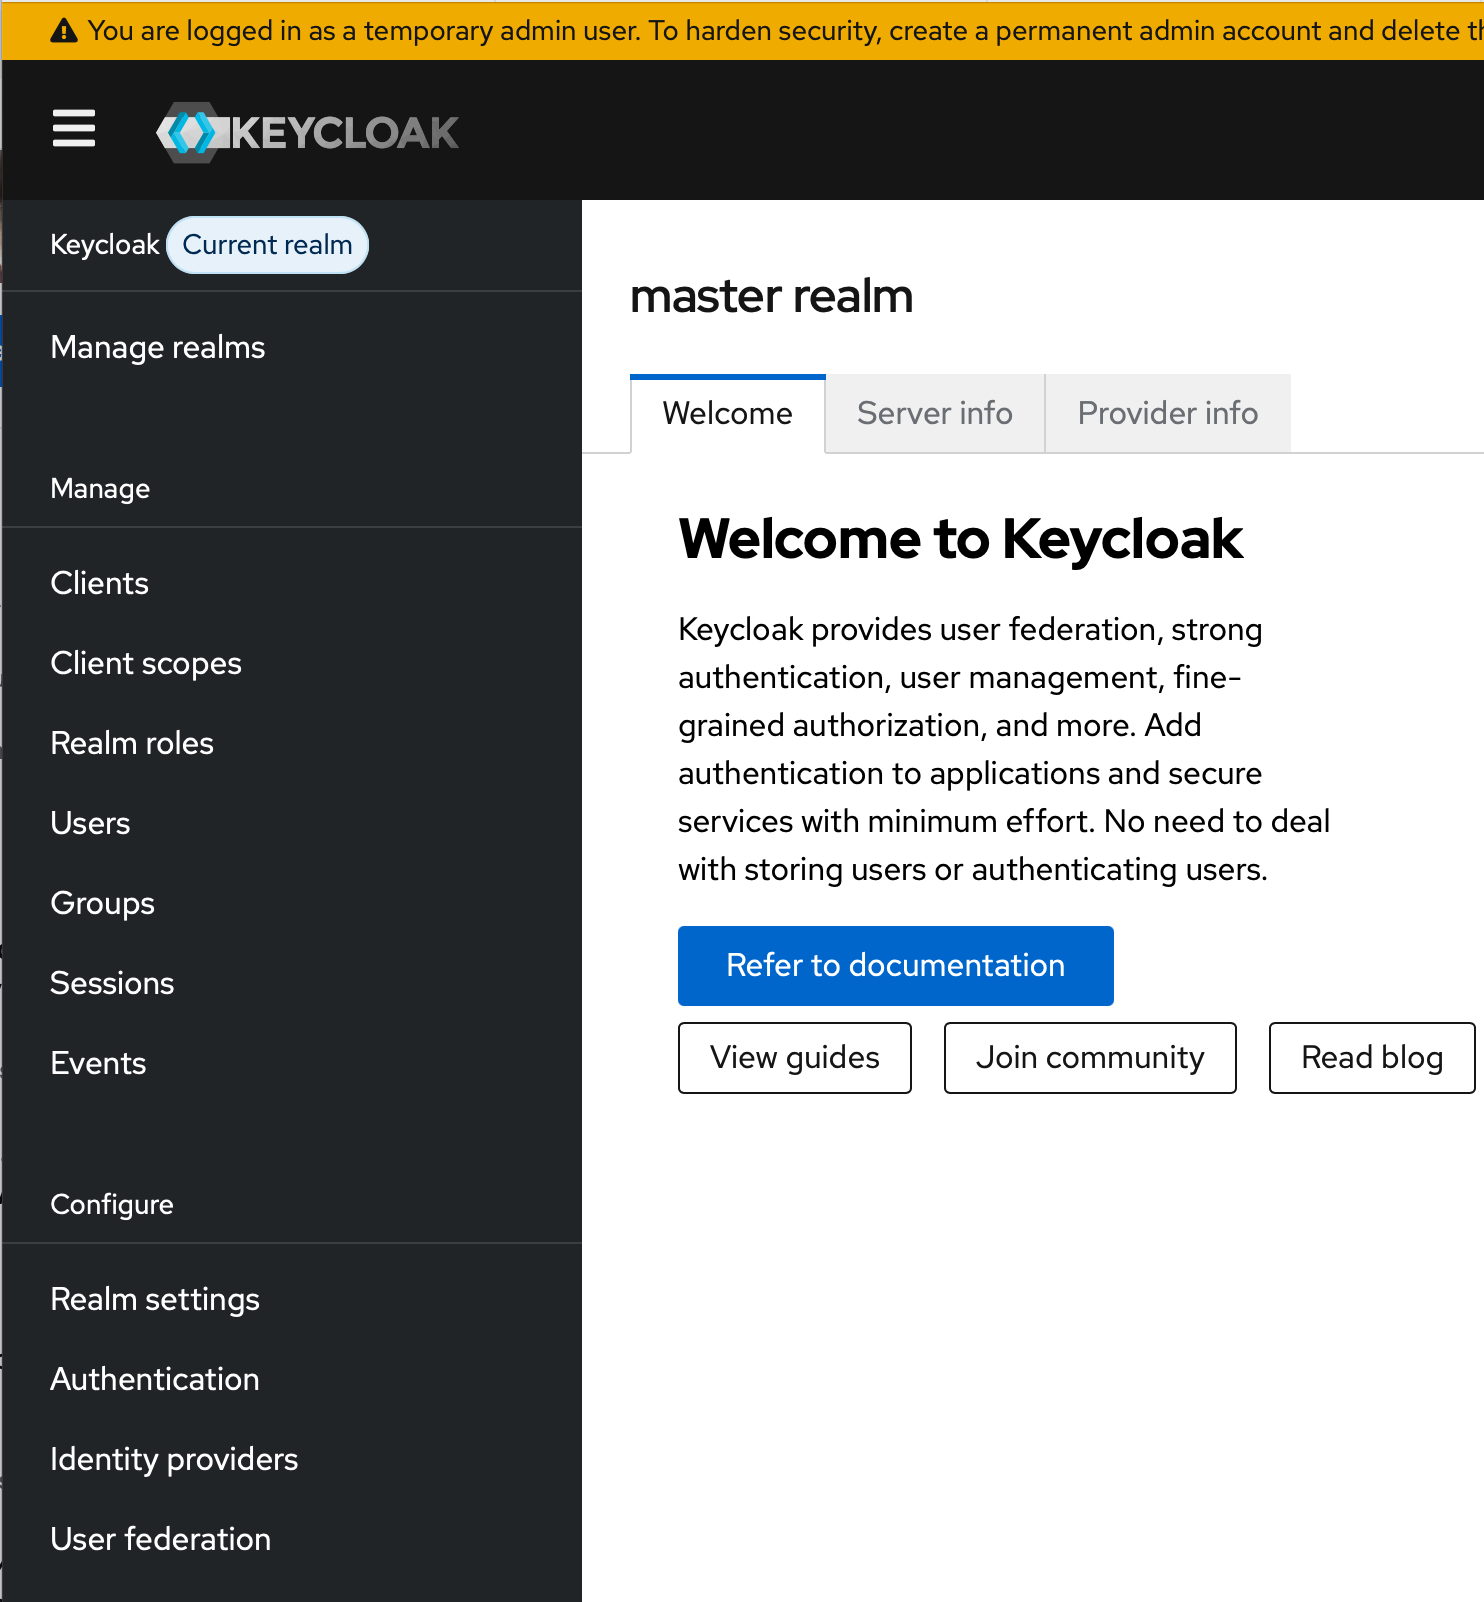
Take a few minutes to explore:
- The left-hand navigation menu (Realms, Users, Clients, Roles, Groups).
- The Current Realm dropdown in the top left.
4. Create Your First Realm
- In the top-left dropdown next to “Current Realm”, click Create realm.
- Enter:
- Realm name:
CyberRealm
- Realm name:
- Click Create.
This creates a new, isolated tenant called CyberRealm.
All users, roles, and clients created from now on will belong to this realm.
5. Create a User Account
- From the left menu, select Users → Create new user.
- Fill in:
- Username:
myuser - First name: your first name
- Last name: your last name
- Email: put any email, e.g test@test.com, firstname@uor.com, anything you like.
- Leave the
required user actionempty
- Username:
- Click Create.
Next, assign a password:
- Click the Credentials tab.
- Enter a password (for example,
Password123). - Set Temporary to Off so that the user does not need to reset it on first login.
- Click Set password.
6. Test the Account Console (Local Access)
- Open the Account Console in a new browser tab:
http://127.0.0.1:8080/realms/CyberRealm/account - Log in with:
- Username:
myuser - Password: the password you created.
- Username:
- Explore the Account Console:
- Update your profile information.
- Review security settings (password, authenticator, sessions).
- Log out and log in again.
You are now successfully managing a user account on your local Keycloak realm.
7. Create a Role
- Return to the Admin Console.
- From the left menu, select Roles → Create role.
- Name the role
student. - Click Save.
To assign the role:
- Go to Users → myuser (
the user you created above) → Role mappings. - Click Assign role → choose Realm roles → student → Assign.
- Confirm that
studentappears under Assigned roles.
8. Verification and Discussion
Verification s
- Log back in as
myuserthrough the Account Console. - Check that the role
studentis now visible in the user’s details.
Discussion
- What permissions does this role currently grant?
- How could Keycloak use roles to restrict or allow access to applications later?
9. Reflection Questions
- Why does Keycloak use realms rather than a single global configuration?
- What is the difference between the Admin Console and the Account Console?
- Why should development setups use
127.0.0.1instead of exposing Keycloak to the public network? - What are the risks of using weak admin credentials, even in a test environment?
- How does assigning roles relate to the principle of least privilege?
Part 3 - Scenario Based Task
You are securing a small internal “Reports” web application used by a cyber risk management team.
The application requires users to sign in through Keycloak, which will manage identities, authentication, and role-based access control (RBAC).
The web app has three restricted areas:
/profile- displays user information and token claims after login./reports- accessible only to users with reporting privileges./admin- accessible only to system administrators.
The aim of this lab is to integrate the application with Keycloak using OpenID Connect (OIDC) and enforce RBAC based on roles defined within the realm.
Task1: Setting up
1. Use the Existing Realm
Continue working within the CyberRealm realm you created earlier.
If needed, open the Admin Console:
http://127.0.0.1:8080
2. Define Realm Roles
Create the following roles to represent access levels in the application.
| Role | Description |
|---|---|
admin | Full access to system management and reports. |
analyst | Access to reports and analytical dashboards. |
viewer | Basic login with read-only access. |
Instructions:
- From the left menu, go to Roles → Add Role.
- Create each role as listed in the table above.
- Verify that all three appear under the Roles list.
3. Create Users and Assign Roles
Create three user accounts to represent different access levels.
| Username | Assigned Role | Example Password (choose anything) |
|---|---|---|
admin_user | admin | Passw0rd1! |
analyst_user | analyst | Passw0rd2! |
viewer_user | viewer | Passw0rd3! |
Instructions:
- In the Admin Console, go to Users → Add User.
- Enter the username and click Create.
- Open the Credentials tab → set the password and toggle Temporary to Off → click Set Password.
- Under Role Mappings, assign the role that matches the table above.
- Repeat for each user.
Check that each user shows their correct role under Assigned Roles.
4. Register the Application Client
The Flask web application will be configured as a client in Keycloak.
From the left menu, go to Clients → Create Client.
While entering the values, hover your pointer over the ? icons beside each field to view helpful explanations of their purpose.
Page 1 - Basic Settings
From the CyberRealm Admin Console:
- Go to Clients → click Create client.
- Fill the form as follows:
| Setting | Value | Description |
|---|---|---|
| Client type | OpenID Connect | Protocol used for web authentication |
| Client ID | risk-app | Unique identifier for the web application |
| Name | CyberRisk Reports App | Optional display name |
| Description | Flask-based web application for the Cyber Risk Management team | Optional context |
| Always display in console | (checked) | Makes it easier to find the client later |
Click Next to continue.
While entering details, hover over each ? icon to read Keycloak’s description of the setting.
Page 2 - Capability Configuration
| Setting | Value | Description |
|---|---|---|
| Client authentication | Off (Public client) | No client secret required for local testing |
| Authorization | Off | Not needed for this simple demo |
| Authentication flow | Standard flow (enabled) | Required for browser-based login (Authorization Code Flow) |
| Direct access grants | Off | Keeps logins through the app interface only |
Click Next when done.
Page 3 - Login Settings
| Setting | Value | Description |
|---|---|---|
| Valid redirect URIs | http://127.0.0.1:5000/callback/keycloak | Must exactly match your Flask app redirect |
| Web origins | http://127.0.0.1:5000 | Defines trusted browser origin |
| Root URL | http://127.0.0.1:5000 | Base URL of the application |
| Home URL | http://127.0.0.1:5000 | Optional - where users land after login |
Click Save to create the client.
Make sure no spaces at the end of each value.
5. Test Logins
Use the Account Console to confirm that each user can log in successfully.
URL:
http://127.0.0.1:8080/realms/CyberRealm/account
Log in with the users and passwords you chose:
admin_user/Passw0rd1!analyst_user/Passw0rd2!viewer_user/Passw0rd3!
Check that each account logs in correctly and that sessions appear as expected.
Note - About the Account Console Access Message
When you test user logins at
http://127.0.0.1:8080/realms/CyberRealm/account, you might see the message:“You do not have permission to access this resource. Sign in with a user that has permission.”
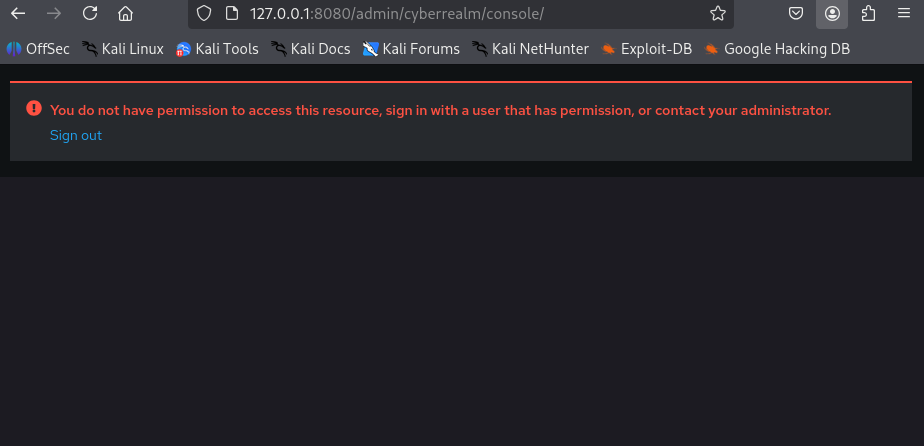
This means that the user successfully authenticated but does not have the required client role to open the Keycloak Account Console.
The login worked - the user’s credentials and realm setup are correct.
The Account Console itself is just another application (client) in Keycloak called
account-console, and by default, only users who have themanage-accountrole under this client can open it.You have two options:
Option 1 - Ignore this message
The authentication is working fine. You can proceed to test the Flask application instead (the Account Console is not required for this lab).Option 2 - Grant console access (optional)
- In CyberRealm, go to Clients → account-console → Roles.
- Locate the role
manage-account.- Go to Users → select user → Role Mappings → Client Roles → account-console.
- Assign
manage-accountto the user.- Log in again - the Account Console will now load correctly.
For this lab, it is perfectly fine to continue without assigning this role, since the primary goal is to test authentication through your Flask CyberRisk App, not the Keycloak console.
6. Summary
You have now:
- Defined three roles within CyberRealm.
- Created three users (
admin_user,analyst_user, andviewer_user) and mapped their roles. - Registered the application client (
risk-app) with localhost redirect and origin settings.
This configuration prepares CyberRealm to authenticate users and enforce role-based access in the Flask application.
Task 2 - Integrating the Local Application
In this part, you will:
- Connect the Flask web application to CyberRealm (Keycloak).
- Log in via Keycloak.
- Verify access control for
/profile,/reports, and/admin.
What You Need
You have two ways to get the application:
Option 1 - Clone the GitHub repository
If you have Git installed:
cd ~
git clone https://github.com/ajcs01/iam-rbac-flask-linux.git
cd iam-rbac-flask
Option 2 - Download the ZIP file
If you prefer not to use Git:
1.Download the ZIP archive from here.
2. Extract it to your workspace, e.g. ~/iam-rbac-flask-linux.
After extraction or cloning, your folder should look like:
~/iam-rbac-flask-linux
│
├─ app.py
├─ .env.example
├─ requirements.txt
└─ templates/
1. Create and Configure the Environment File
Important Note:
The.envfile stores sensitive configuration variables used by Flask and Keycloak.The details in this
.envfile must match your Keycloak setup exactly.
- If you used a different Realm name, update it here (replace
CyberRealm).- Ensure the IP address (127.0.0.1) and ports (8080 for Keycloak, 5000 for Flask) are the same as those configured in your Keycloak client.
- If you follow this lab exactly as written, you do not need to change anything.
- If your setup differs (e.g., you used
localhostor a custom realm name), make sure these values are aligned, or you’ll encounter login/redirect errors.
You can edit your .env file directly from the terminal using nano, a simple text editor:
    cd ~/iam-rbac-flask-linux
    nano .env.example
Your .env should contain the following:
FLASK_SECRET_KEY=change-this-in-production
KC_ISSUER=http://127.0.0.1:8080/realms/CyberRealm
KC_CLIENT_ID=risk-app
KC_CLIENT_SECRET=
KC_REDIRECT_URI=http://127.0.0.1:5000/callback/keycloak
PORT=5000
-
It must be named .env (with a leading dot) - not
.env.txtorenv.env. -
If you downloaded
.env.example, rename or copy it to.env:macOS / Linux
cp .env.example .envWindows (PowerShell)
Copy-Item .env.example .envYou can check that it exists:
ls -laExample output:

2. Set Up the Python Virtual Environment
cd ~/iam-rbac-flask-linux
python3 -m venv .venv
source .venv/bin/activate
pip install -r requirements.txt
If you don’t have requirements.txt, you can install manually:
pip install Flask==3.0.3 authlib==1.3.1 python-dotenv==1.0.1 itsdangerous==2.2.0
3. Run the Flask Application
Port reminder
- Keycloak (Identity Provider): http://127.0.0.1:8080
- Flask Application: http://127.0.0.1:5000
Make sure the Redirect URI and Web Origins in your Keycloak client (
risk-app) use the same port as your Flask application.
If you change the port here, update it in:
- The
.envfile (underPORT=and in theKC_REDIRECT_URIline)- The Keycloak client settings in CyberRealm → Clients → risk-app → Login settings
Option 1 - Run using Flask CLI (recommended)
This method automatically loads the .env configuration.
flask --app app run --debug
Open your browser at: http://127.0.0.1:5000
You should see the CyberRisk App homepage with a “Login with Keycloak” button.
Option 2 - Run directly with Python
If you prefer to start the application manually:
python app.py
Note:
The provided application uses the port defined inside the code and.envfile.
It does not currently support passing a custom port (e.g.,python app.py --port 5050).If the default port
5000is busy and you want to change it manually:
- Open the
app.pyfile in a text editor (for example, in Linux usenano app.py).- Scroll to the very end of the file - you will see a line like:
if __name__ == "__main__": app.run(debug=True, port=PORT)- Replace
PORT(in uppercase) with the number of your desired port. For example:app.run(debug=True, port=5050)- Save the file and re-run:
python app.pyRemember to update both your
.envand your Keycloak client settings to match the new port.
3. Test Logins and Role Gating
Use the users you created in CyberRealm:
| Username | Password | Expected access |
|---|---|---|
admin_user | Passw0rd1! | /profile, /reports, /admin |
analyst_user | Passw0rd2! | /profile, /reports (not /admin) |
viewer_user | Passw0rd3! | /profile only; /reports and /admin → 403 |
After each login:
- Visit
/profileto view the decoded token claims.- Roles appear under
realm_access.roles.
- Roles appear under
- Visit
/reportsand/adminto confirm access control behaves as expected.
4. Evidence to Capture
- App home page after a successful login.
/profileshowing the role claims for each user account.- 403 error example when a user attempts to access a restricted route.
Troubleshooting
- Invalid redirect URI: In CyberRealm → Clients →
risk-app→ Login settings, confirm
http://127.0.0.1:5000/callback/keycloakmatches exactly. - 403 on protected routes: Check the user’s assigned role in CyberRealm → Users → Role mappings; log out and log back in.
- Using localhost vs 127.0.0.1: Use
127.0.0.1consistently in the client settings,.env, and browser URL.
Outcome
At this point you can authenticate through Keycloak and enforce role-based access in the local application.
Part 4: Extensions for IAM Lab
This section includes three optional extensions to explore beyond the core lab.
They are designed to deepen your understanding of authentication, authorisation, and session management in Keycloak.
Optional Extension - Single Sign-On (SSO) and Session Management
If you complete the main lab early, explore how Keycloak manages sessions across multiple clients and observe how logout behaves.
1. Observe SSO in Action
While still logged in to your Flask app (risk-app):
- Open a new browser tab and visit the Keycloak Account Console:
http://127.0.0.1:8080/realms/CyberRealm/account - You should already be signed in automatically - this demonstrates Single Sign-On (SSO) within the same realm.
Explore the Profile, Applications, and Sessions tabs to see how Keycloak tracks your session.
2. Test Logout Scenarios
Try the following and observe what happens:
| Action | Expected result |
|---|---|
Log out from the Flask app (/logout) | The Flask session ends, but you remain logged in to Keycloak. |
| Refresh the Account Console | Still signed in (Keycloak session active). |
| Log out directly from the Account Console (“Sign out everywhere”) | Both Keycloak and Flask sessions end. Next visit to /profile or /reports requires a new login. |
3. Optional Exploration
If you’re curious, create a second client in CyberRealm (e.g. risk-viewer) and observe that both appear under Applications in the Account Console once logged in.
This demonstrates multi-client SSO inside the same Keycloak realm.
Tip:
You can discuss with your peers how session management affects security and usability - for instance, the trade-off between global logout convenience and persistent sessions across multiple applications.
Optional Task - Token Analysis and Validation
Explore and interpret the contents of your Keycloak-issued ID token to understand how Keycloak communicates user identity and roles to client applications.
1. Retrieve Your ID Token
You can view your token in one of two ways:
Option A - Using the /profile route
- Log in to the Flask app.
- Visit
/profile. - Copy the section labelled “ID Token” or “Token Payload”.
It will look similar to this:
{
  "exp": 1735629331,
  "iat": 1735629031,
  "auth_time": 1735629027,
  "jti": "1b0e1a64-...",
  "iss": "http://127.0.0.1:8080/realms/CyberRealm",
  "aud": "risk-app",
  "sub": "da4d6c8d-...",
  "typ": "ID",
  "preferred_username": "admin_user",
  "email_verified": false,
  "realm_access": {
      "roles": ["admin", "analyst"]
  }
}
Option B - From Keycloak directly
- Open the Account Console:
http://127.0.0.1:8080/realms/CyberRealm/account - Go to Applications → risk-app → OpenID Connect details.
- Copy the Access Token or ID Token shown there.
2. Decode the Token
Open a new browser tab and visit: https://jwt.io/
- Paste your token into the Encoded box.
- Observe the decoded JSON payload under Payload.
Tip: The token is Base64URL-encoded, not encrypted - that’s why you can view it safely.
3. Analyse the Claims
Answer the following questions:
| Question | Hint |
|---|---|
What is the value of the "iss" (issuer) field? | It should match your Keycloak realm URL. |
What does "aud" represent? | It identifies the client (the Flask app, risk-app). |
| How long is the token valid? | Compare "iat" (issued at) and "exp" (expiry). |
Which roles are included in "realm_access.roles"? | These determine RBAC permissions in the Flask app. |
| Which claim identifies the user? | Look for "preferred_username" or "sub". |
4. Validate the Token Signature
If you want to verify authenticity:
- Visit the Keycloak JWKS (public key) endpoint:
http://127.0.0.1:8080/realms/CyberRealm/protocol/openid-connect/certs - Copy the public key.
- Use a JWT verification tool or Python library like
python-joseto validate the token signature offline.
Reflection:
Understanding token structure helps you verify authentication flows, diagnose “Invalid token” issues, and confirm that roles and claims are correctly issued by the Identity Provider.
Part-5: (EXTRA) Suggested exploration
Google Identity Platform
Try creating a test OAuth 2.0 client in the Google Cloud Console
Observe how client IDs, redirect URIs, and scopes follow the same structure as Keycloak.
GitHub OAuth Apps
Create a developer app at https://github.com/settings/developers
Compare its redirect URI and token endpoints to your risk-app configuration.
Microsoft Entra ID (formerly Azure AD)
Explore how enterprise SSO uses the same OpenID Connect principles:
Optional reading
- Keycloak Documentation - Identity Brokering and Social Login
https://www.keycloak.org/docs/latest/server_admin/#_identity_broker - Google Developers - OAuth 2.0 for Web Server Applications
https://developers.google.com/identity/protocols/oauth2/web-server
Best,
Ali.